Rich and creamy White Chocolate Raspberry Cheesecake Bars made with a white chocolate cheesecake filling, thick raspberry swirl, and a buttery shortbread crust. Cheesecake bars are much easier than preparing a whole cheesecake making this a recipe you’ll come back to again and again.
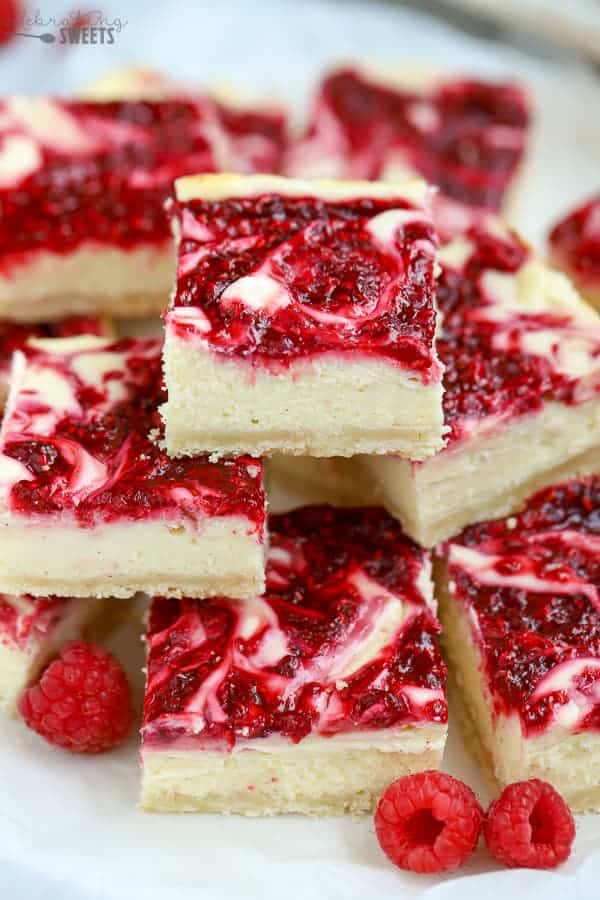
I absolutely love cheesecake! This recipe joins my traditional Cheesecake Bars, along with Cheesecake Cookies, Pumpkin Cheesecake Bars and Greek Yogurt Cheesecake.
Bonus: This recipe is less intimidating than making a regular cheesecake. No need for a springform pan and no water bath.
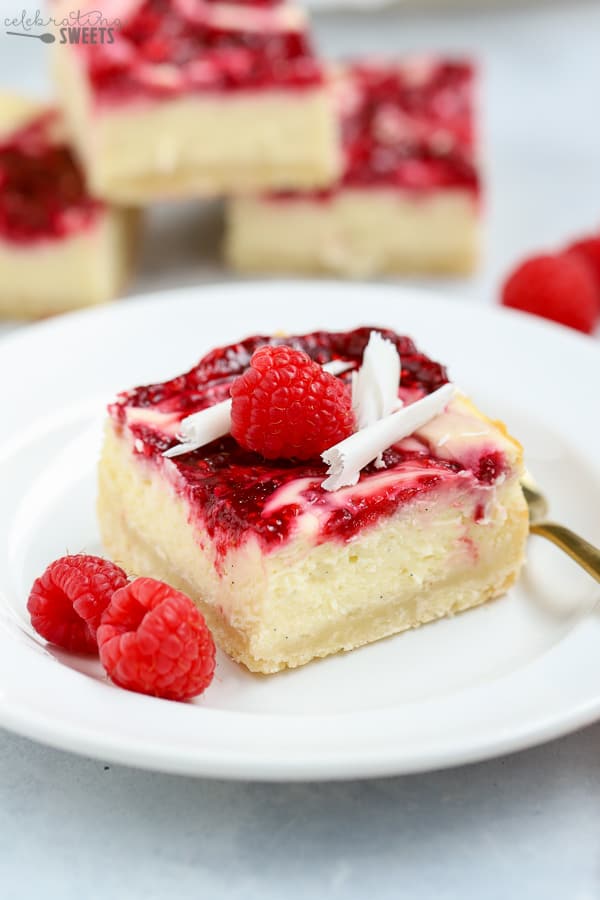
I have been planning to create a White Chocolate Raspberry Cheesecake recipe for months, and I finally got the push I needed when I saw a recipe on the Food Charlatan. Karen’s Cheesecake Bars had a SHORTBREAD CRUST, and I was sooooo intrigued. Yes, I love a graham cracker crust, BUT, a shortbread crust sounds so fabulous! I took that shortbread crust, then added my favorite white chocolate cheesecake filling and thick swirls of sweet-tart raspberry puree. If you’re wondering if it is as insanely delicious as it sounds, the answer is YES.
Jump to:
How to make white chocolate raspberry cheesecake
- Raspberry Swirl: This recipe starts with making the raspberry swirl because we need it to be cool before adding it to the cheesecake. In a small saucepan, combine frozen raspberries, sugar, water, and cornstarch. Cook until bubbling and thickened, then set aside to cool.
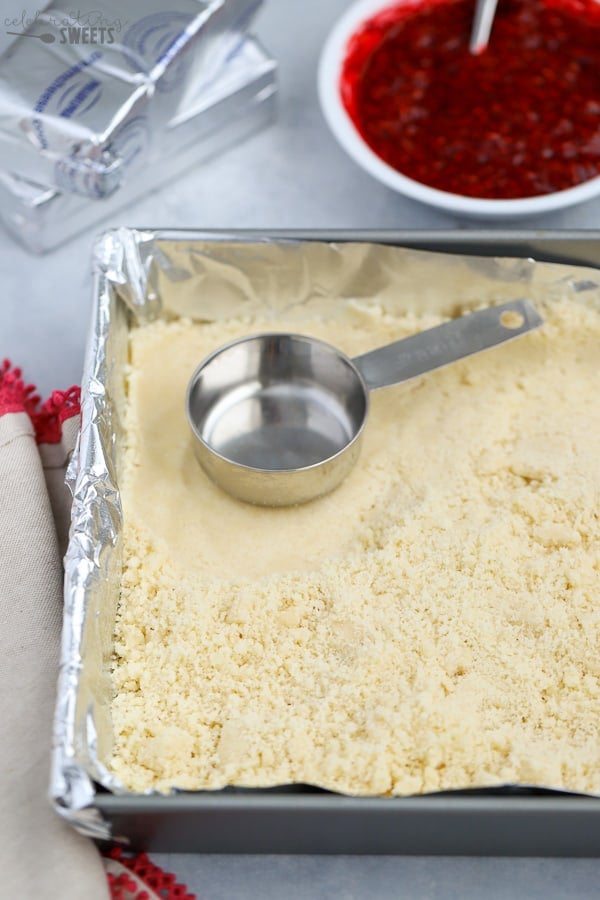
- Shortbread Crust: A mixture of butter, flour, sugar, and salt makes up the crust. Press this crumbly mixture into the bottom of a 9×9 baking pan. Give the crust a head start by baking it for about 10 minutes while you prepare the filling.
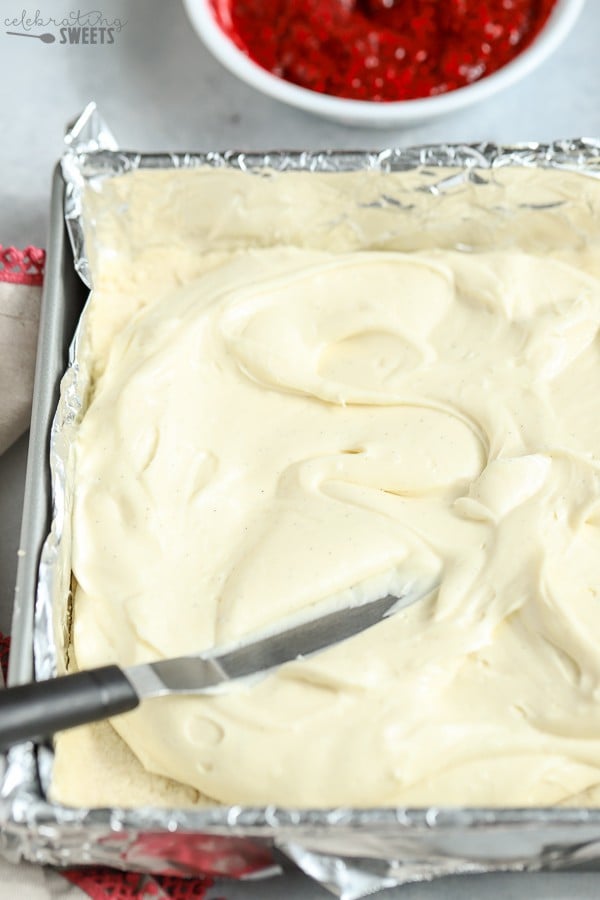
- Cheesecake Filling: Beat cream cheese, sugar, eggs, vanilla, and melted white chocolate. Pour this creamy filling right into the pre-baked crust.
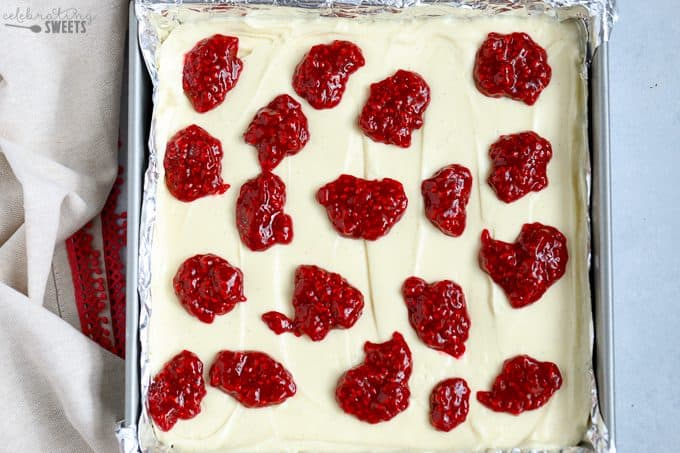
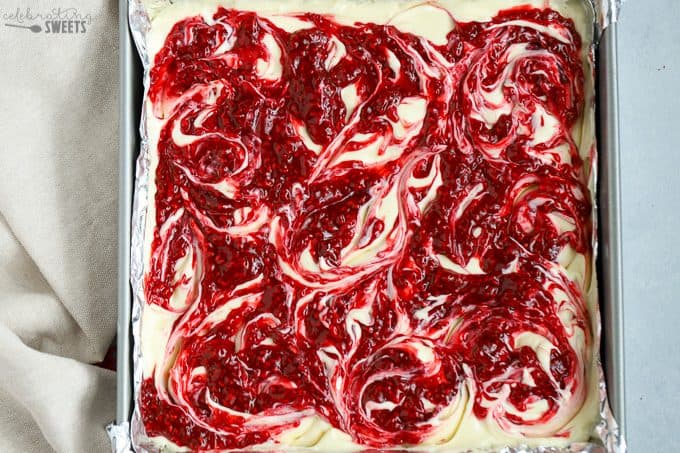
- Assembly: After adding the cheesecake batter, dollop portions of raspberry puree all over the top. Use a sharp knife to swirl the raspberry into the cheesecake. Bake the cheesecake for about 30 minutes.
Recipe tips
- Line the bottom of your baking pan with foil or parchment paper. This allows you to lift the whole portion of cheesecake out of the pan. Make sure they are completely cool before cutting.
- Don’t overbeat your filling. Adding too much air into the cheesecake batter can make it deflate during or after baking.
- Don’t bake higher than 325°F. Although most baking recipes call for a 350°F oven, I find that cheesecake bakes more evenly and avoids cracking if it bakes at a slightly lower temperature.
- Make sure your cream cheese is softened to room temperature. If the cream cheese is still cold it will not blend smoothly. Room temperature cream cheese will be extra smooth and creamy with no little lumps.
- Cool it completely! When you pull this from the oven the center will still be slightly jiggly. Once the bars cool completely the filling will firm up and make it easy to cut nice clean squares.
Should cream cheese be at room temperature for cheesecake?
YES. Absolutely! The actual filling of this cheesecake is super simple. You basically just mix everything with an electric mixer until combined. But if you don’t plan ahead and have your cream cheese at room temperature, it will form little lumps throughout the filling. Just set out the cream cheese on your kitchen counter an hour or so in advance of starting the cheesecake. Note: You have to make the raspberry puree in advance also (so it has time to cool), so pull out the cream cheese around that time.
Cooling
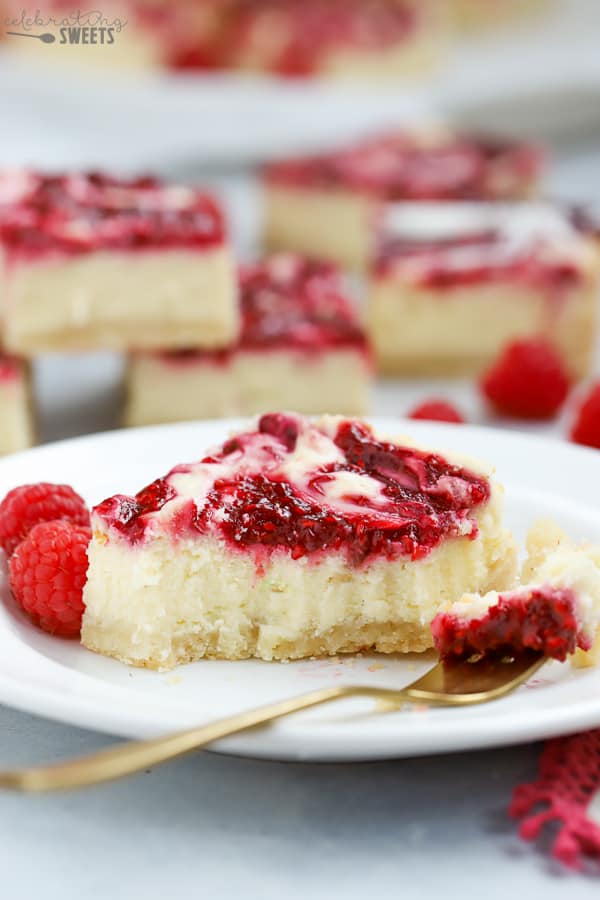
Allow the cheesecake to cool completely before cutting it. I cool it to room temperature, then tightly cover it and place it in the refrigerator for several hours or overnight. Is this torture? Yes. Your willpower will be tested, but your your patience will be rewarded with perfect cheesecake squares!
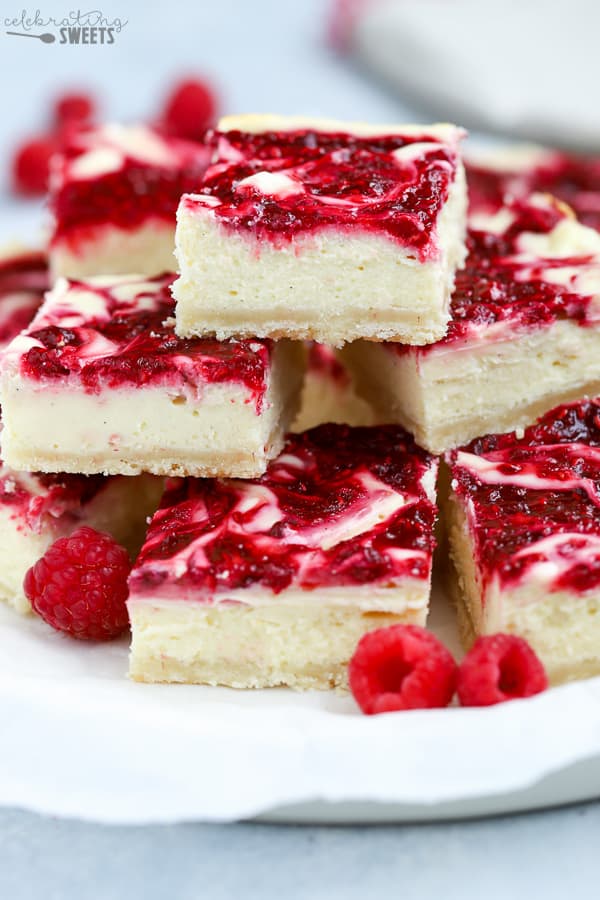
Smooth and creamy white chocolate cheesecake, tart raspberry swirl and a buttery crust. Talk about a flavor marriage that is outrageously delicious. Find some friends to share these with, because if you’re anything like me you won’t be able to control yourself around them.
YOU MIGHT ALSO LIKE: WHITE CHOCOLATE RASPBERRY TRIFLE – WHITE CHOCOLATE MOUSSE – WHITE CHOCOLATE MACADAMIA COOKIES – PUMPKIN PIE CHEESECAKE

Recipe
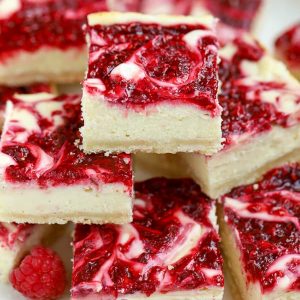
White Chocolate Raspberry Cheesecake
Ingredients
Raspberry puree:
- 2 scant cups frozen raspberries, still frozen
- ¼ cup granulated sugar, increase to ⅓ cup for a less tart puree
- 1 tablespoon water
- 2 teaspoons cornstarch
Crust:
- ½ cup unsalted butter, softened
- ½ cup granulated sugar
- 1 ¼ cups all purpose flour
- ⅛ teaspoon salt
Cheesecake filling:
- 16 oz cream cheese, softened
- ⅔ cup granulated sugar
- 2 large eggs
- 1 tablespoon all purpose flour
- 2 teaspoons pure vanilla extract or vanilla bean paste
- scant ⅔ cup white chocolate, melted*
- shaved white chocolate and/or fresh raspberries , for garnish, optional
Instructions
Raspberry puree:
- In a medium saucepan, combine frozen raspberries, sugar, water, and cornstarch. Bring to a simmer and simmer for 2-3 minutes, until thickened slightly (it will thicken more as it cools). Mash the raspberries with a spoon or rubber spatula until no large chunks remain. Set aside to cool completely.
Crust:
- Preheat oven to 325°F. Line a 9×9 square baking pan with foil or parchment paper. Grease it well, set aside.
- Using a hand mixer or stand mixer fitted with the paddle attachment, beat butter and sugar for several minutes, until smooth and combined. Add flour and salt and beat until combined (the mixture will be crumbly, but it should hold together if you squeeze it with your fingertips).
- Dump the dough into the prepared pan and press it into a flat, even layer. I use the back of a measuring cup to press it down (be careful not to pack it in too tightly, or the crust will be hard to cut through). If necessary, moisten your fingers or the bottom of the measuring cup with water to keep the dough from sticking as you press it in. Bake the crust for 10 minutes. While the crust is baking, prepare the filling.
Cheesecake filling:
- Using a hand mixer, or stand mixer fitted with the paddle attachment, beat cream cheese and sugar until well combined. Add eggs, flour and vanilla and beat until combined. Add cooled white chocolate and beat combined.
- Pour the cheesecake filling into the pre-baked crust. Add dollops of raspberry puree all over the top of the cheesecake batter, use a sharp knife to swirl the raspberry into the cheesecake.
- Bake for another 30-35 minutes, until the edges are beginning to turn golden brown, the outside is set, it’s ok if the very center is still a little bit jiggly. Place the pan on a wire rack to cool, then cover and transfer to the refrigerator to cool completely.
Notes
Nutrition
Nutritional Information is an estimate based on third-party calculations and may vary based on products used and serving sizes.

Karen says
any ideas in increasing this recipe for a 9×13 pan? or do you think I am better off making 2 batches? (feeding a crowd!)
Thanks!
Celebrating Sweets says
Hi, Karen. I would guess that you would need one and a half of this recipe for a 9×13 (I think doubling it might be too much). I have not tested it in a 9×13, so I can’t say for sure. If you want to play it safe, I’d say make two batches of the 9×9. Enjoy!
Linda Bierie says
Can I substitute an Oreo cookie crust for the shortbread?
Celebrating Sweets says
Sure! I don’t have an Oreo crust recipe, but if you have one that you like, you can definitely use it.
Liz says
I’m looking forward to making these soon…they look delicious! Just wondering if they’re freezer friendly?
Celebrating Sweets says
Hi, Liz. I have frozen a few leftover bars and we were happy with them. Although I do think they are best when they are freshly baked. Enjoy!
Liz says
Thanks so much!
Tina says
So I dont need to strain the rasberries?
Celebrating Sweets says
Hi, Tina. I do not strain the raspberry puree. If you don’t like the seeds you are welcome to strain it, but I don’t mind them so I leave it as is. Enjoy!
Laura says
Great recipe! I wanted the same effect but in a circular shape so I tried it in a 9 inch pan and it worked perfectly! Tastes amazing, too.
Celebrating Sweets says
I’m glad you enjoyed it! Thanks for stopping by. 🙂
Dan says
These look so good! Do you think it would be okay to make it with raspberry jam and water it down a bit? Or would it still require cornstarch?
Thanks!
Celebrating Sweets says
You can definitely try it. My guess is that it would work. Enjoy!
Blake says
My partner and I baked this over a video call together. He isn’t the best in the kitchen, but this recipe was easy for him to follow and his family loved it. He used a glass pan and it still turned out great. I follow the recipe but subbed half the raspberries for blueberries (I didn’t have enough raspberries) and mashed them, used a metal pan, and mine also turned out amazing. Hard to believe there was enough batter to make it into the pan with how much I was eating along the way 🙈 this recipe is strong enough to withstand a beginner baker with not perfect tools, and a more experienced one making some required changes. Thanks for a recipe that’s going to become a staple for us!
Allison says
You’re welcome! Thanks for sharing your experience. 🙂
cheryl Murphy says
we don’t have graham crackers in Australia…..will digestives do
Allison says
This recipe doesn’t use graham crackers. It’s a homemade shortbread crust.
Shannon says
I know this recipe has been out for some time, but I’ve made these several times and they are to die for. I would like to incorporate some lemon zest next time. Thank you for such an easy and impressive recipe.
Allison says
You’re welcome! I’m glad you enjoyed them. 🙂
Kimberly says
Something is off with either the timing or temperature of this recipe. I followed the recipe exactly as written, it was clearly not done at 30 minutes, or 35. I left it in for 40-45 minutes before I took it out, afraid I might overcook it. Ultimately the top half was quite gooey and undercooked. The flavors were good, but I wish there was an accurate time/temp so it would be fully cooked.
Arianna says
I made this last year for my boyfriends birthday and it turned out amazing!
Allison Mattina says
I’m glad you enjoyed it!