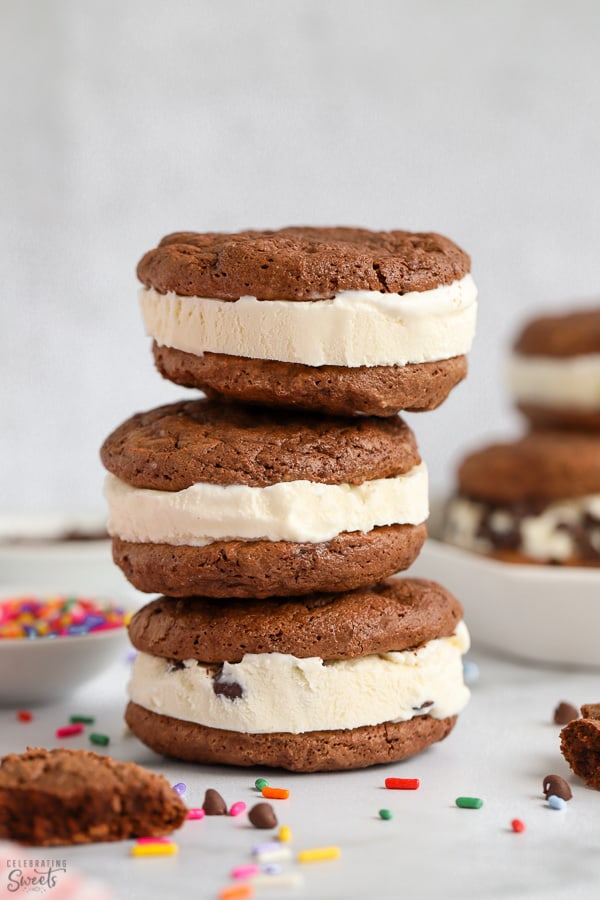
Soft and fudgy brownie cookies sandwiching a big scoop of ice cream (use your favorite flavor). This semi-homemade dessert is perfect for summer!

This semi-homemade recipe combines fudgy homemade brownie cookies and store bought ice cream for a delicious summer dessert that is fun to make and eat.
I absolutely love brownies (fudgy brownies, peanut butter brownies, Nutella brownies, caramel brownies…) and the beauty of this recipe is that I get to combine brownies with one of my other favorite desserts: ice cream!
How to make Ice Cream Sandwiches
This recipe is fairly simple. It’s basically two steps: make the cookies and then assemble the sandwiches.
Brownie Cookies: My Brownie Cookie recipe is perfect for these sandwiches because the cookies stay soft even when they’re frozen. If you like the flavor of a rich fudgy brownie you will love these cookies.
Ice Cream: One of the benefits of making ice cream sandwiches at home is that you get to choose your favorite flavor of ice cream. I use store bought ice cream or homemade salted malted vanilla ice cream.

Tips for assembly
Option 1: Place a scoop of ice cream onto the underside of a cookie. Use the back of a spoon to carefully spread the ice cream, then top with another cookie. TIP: Pop the cookies into the freezer for 30 minutes to get them firmed up before spreading the ice cream on.
Option 2 (pictured): Using a sharp knife, cut directly through a pint of ice cream, making thin disc-like slices. Peel off the outer paper from each slice of ice cream and immediately place it between two cookies. Note: I recommend wiping down the outside of the pint before cutting into it. The bottoms of some ice cream containers have a little lip to them, so I cut that off first.
Add nuts, sprinkles, or mini chocolate chips to the outer edges of the sandwiches. After assembling the sandwiches, roll or press the “toppings” into the sides.

Serving and storage
Serving: You can serve these sandwiches immediately after assembly assuming that you are working quickly and your ice cream isn’t too soft. If your ice cream gets too soft during assembly you can place the sandwiches in the freezer for an hour or two to firm up.
Storing: These sandwiches can be assembled then tightly wrapped and frozen for up to 1 week.


Recipe

Brownie Ice Cream Sandwiches
Ingredients
- 1 cup all purpose flour
- ¼ teaspoon baking powder
- ¼ teaspoon salt
- 1-¼ cups semisweet chocolate chips
- 3 tablespoons chilled unsalted butter, cut into large pieces
- 1 cup granulated sugar
- 1-½ teaspoons pure vanilla extract
- 3 large eggs
- 3 pints ice cream (or one 1.5 quart container)
- chopped nuts, sprinkles, or mini chocolate chips, optional for the sides of the sandwiches
Instructions
Brownie cookies:
- In a medium bowl, combine flour, baking powder, and salt. Set aside.
- In a large bowl, slowly melt butter and 1-¼ cups chocolate chips in the microwave** stirring until smooth. Add the sugar and vanilla and stir with a rubber spatula until combined (it will be thick). Add the eggs one at a time, whisking well between each addition. Once the last egg has been combined, whisk vigorously for 30 seconds.
- Add the flour mixture and use a rubber spatula to stir until combined. Place the bowl in the refrigerator for 30 minutes to 1 hour for the dough to firm up.
- Preheat oven to 325°F and line two baking sheets with parchment paper (don't skip this). Scoop the dough into 1-½ to 2 tablespoon portions and place at least 2 inches apart on the prepared baking sheets. When you scoop the dough onto the baking sheets the dough should spread a tiny bit. If it doesn't spread at all, moisten the palm of your hand and flatten each dough mound slightly.
- Bake the cookies for 10-14 minutes, until the edges are beginning to set, but they're still a bit underdone in the center. Rotate the baking sheets once during bake time. The cookies won't get their crackly tops until the very end of cook time or after removal from the oven. Place the baking sheets on wire racks to cool. Once they have cooled and firmed up, use a spatula to release the cookies from the parchment.
Assembly:
- Option 1: Place a scoop of ice cream on the underside of a cookie. Use the back of a spoon to carefully spread the ice cream, then top with another cookie. TIP: Pop the cookies into the freezer for 30 minutes to get them firmed up before spreading the ice cream on.Option 2 (pictured): Using a sharp knife, cut directly through a pint of ice cream, making thin disc-like slices. Peel off the outer paper from each slice of ice cream and immediately place it between two cookies. Note: I recommend wiping down the outside of the pint before cutting into it. The bottoms of some ice cream containers have a little lip to them, so I cut that off first.
- Add nuts, sprinkles, or mini chocolate chips to the outer edges of the sandwiches. After assembling the sandwiches, roll or press the “toppings” into the sides.
Notes
Nutrition
Nutritional Information is an estimate based on third-party calculations and may vary based on products used and serving sizes.


Thalia @ butter and brioche says
Chocolate and cherries with everything please! These ice cream sandwiches look AMAZING.
Celebrating Sweets says
Thanks, Thalia!
Kathleen @ Yummy Crumble says
This is awesome! I love how easy. and yes, I’m going to hate you for these! 🙂
Celebrating Sweets says
Ha! Thanks, Kathleen! They are very dangerous. 🙂
Eden Passante says
Wow! These look amazing!! Two of my favorite things together!
Celebrating Sweets says
Thanks, Eden!
Teri says
I’m looking forward to summer so I can try these sandwiches.
Nellie Tracy says
I love these ice cream sandwiches! Perfect for summer!
Beth says
The options for this recipe are endless! I can see my kiddos having a lot of fun making this and enjoying this all Summer!